|
|
Tailplane tips |
|
|
|
Navigation & Acknowledgements |
5 pictures on this page - scroll down to see the rest
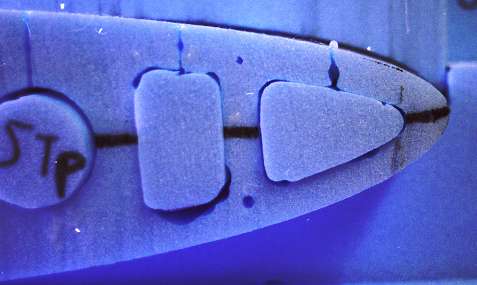
Epoxy drip after plugging TP tip: 2001 06 29.
Canon AV-1, Kodak Royal Gold 200.
Spot the error! This tailplane was the other way up when I secured the tip plugs with 5-minute epoxy, and of course some excess epoxy ran down the hot-wire slot. This is very irritating to correct as the epoxy is much tougher than the surrounding foam, so it's hard to remove it without tearing out a chunk of the foam. A Dremel tool with a Perma-Grit cutter is about the best way I've found to deal with these epoxy drips, but there's usually some filling with dry micro needed afterwards.
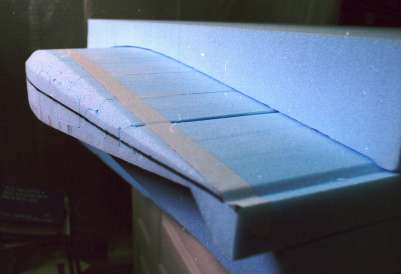
First stage of shaping TP tip: 2001 06 29.
Canon AV-1, Kodak Royal Gold 200.
To shape the tailplane tips, I used the same techniques I've learned while shaping solid balsa tips on model aeroplanes. After cutting the tip to the shape of the airfoil profile and plugging the lightening holes, I filed off the top corner at about 45 degrees all the way along, leaving about one-third of the horizontal and vertical faces untouched. Note that the angled surface looks about twice as wide as each of the remaining horizontal and vertical surfaces. No need to measure, eyeball precision is all that's necessary here.
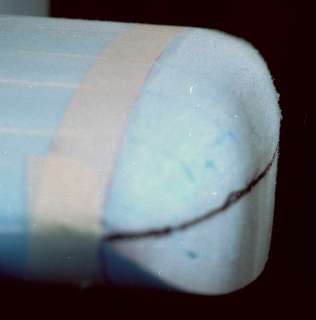
Second stage of shaping TP tip: 2001 06 29.
Canon AV-1, Kodak Royal Gold 200.
Next, I made smaller chamfers on each of the sharp corners, and started to smooth all the corners into a continuous curve. This is even easier than shaping balsa as the foam presents almost no resistance to the file, but care is needed to avoid taking off too much too soon. The "piecewise linear approximation" method I use allows the most of the waste to be removed quite quickly while minimising the danger of going too deep.
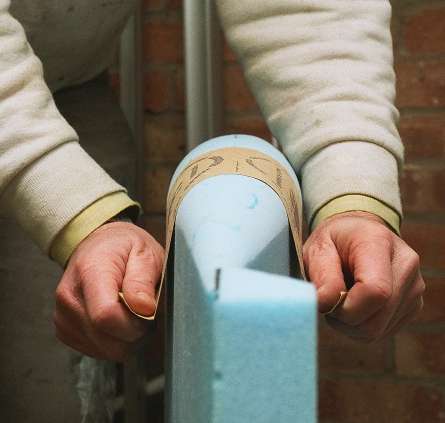
Final shaping of TP tip: 2001 06 29.
Canon AV-1, Kodak Royal Gold 200.
The other face of the tip was shaped in the same way as the first, giving an almost semi-circular cross-section to the tip. To get the profile correct, and the surface smooth, I switched to sandpaper held as shown here, moving the hands up and down alternately. This produces, almost automatically, the desired semi-circular profile, because the sandpaper will only touch the high spots. As well as oscillating it, the sandpaper must be moved chordwise continually to keep the fore-and-aft profile smooth.
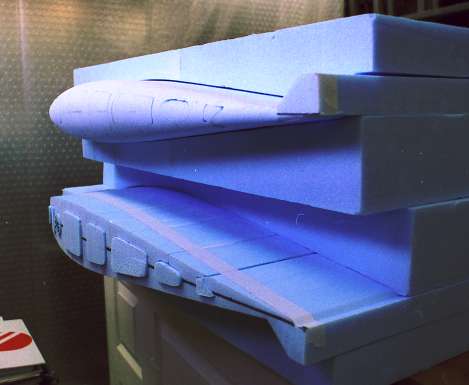
TP tips before and after shaping: 2001 06 29.
Canon AV-1, Kodak Royal Gold 200.
Here is the final result compared to the other tip, which so far has only been bandsawn to shape and had its tip plugs inserted. The finished tip has a few small holes where the plugs didn't fit too well, and they will get filled with dry micro before the glass goes on.
|
|
|
go to next picture page |
|
|
||
| Return to Rowland's home page |
| This page last updated 2013-10-16. I try to make this page as accessible as possible, by adhering to HTML 4 standards. |
|
|
| I welcome comments on this website. However, because of the amount of spam it attracts, I no longer post a direct e-mail address on any page. Instead, please click here to contact me. You will have to confirm that you are human before the message will be sent on to me. | ||