|
|
Gel-coating rudder |
|
|
|
Navigation & Acknowledgements |
3 pictures on this page - scroll down to see the rest
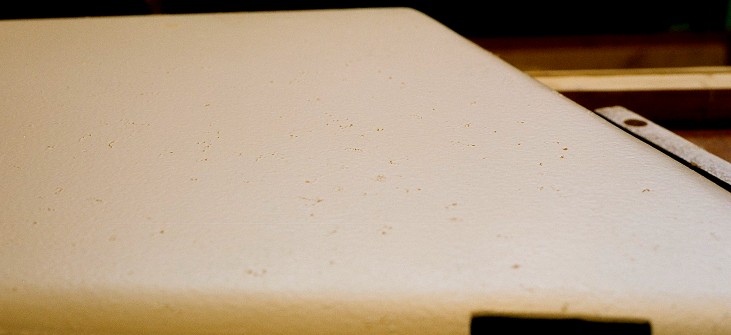
Hairy mess in gel-coat: 2004 05 25.
Canon AV-1, Fujicolor Superia Reala.
The results of my first attempt to apply gel-coat to the rudder - a hairy mess! I had made a small test-piece on a piece of wood to get familiar with the use of the gel-coat, but had used a brush for that. On the rudder, I used a roller as suggested by my inspector. However, my roller (despite being bought from a specialist composite supplier) was clearly of inferior quality to his, since, with each of the three coats, it left increasing amounts of fibres behind on the rudder. This pictures fails to convey how disappointing it looked and felt. As well as the clusters of hairs (which show up as darker spots), there was an overall "orange-peel" effect. I've lowered the brightness and increased the contrast of the picture to show the defects more clearly.
Incidentally, my supplier,
Severn Valley Sailplanes,
spells this gel-coat as "Swalberlack" on their containers but elsewhere I have seen various other spellings such as "Swabelack" and "Schwabellack". Google searches have so far failed to find any website of the original manufacturer to confirm the correct spelling.
I was a bit confused when I first heard of gel-coat finishing for gliders and other aircraft, because my only previous experience of the term "gel-coat" was in mould-made composite structures such as model boat hulls. There, you start with the gel-coat by applying it to the inside of a polished female mould. The gel-coat is just standard polyester laminating resin, usually with opaque white filler and/or a colour dye added as desired. Once the gel-coat has gelled, glass and polyester resin layers are laid up on it to provide the necessary structural qualities. Provided the mould has been correctly finished, no further finishing is required after demoulding.
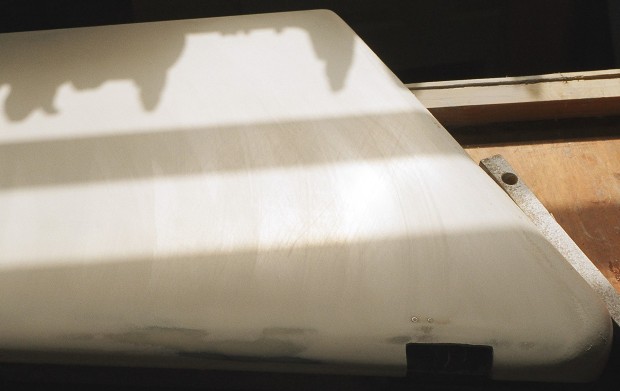
Gel-coat rubbed down: 2004 05 25.
Canon AV-1, Fujicolor Superia Reala.
I expected that I'd have to rub the hairy mess in the previous picture right back to the filler and start again, but was surprised and relieved to find that it looked and felt much better after a few hours wet sanding with 240-grit emery paper on a piece of aluminium channel. The hairy lumps went quite quickly, but the "orange-peel" took longer to disappear. Because the rivets on the CS29 rudder horn are slightly proud of the surface, the hard, flat sanding block has cut through to them. This was not intentional, and there was no need to take the rest of it back to the filler. I expected to be able to see embedded hairs, but could not find any! The light and dark areas on the rudder are shadows from the window.
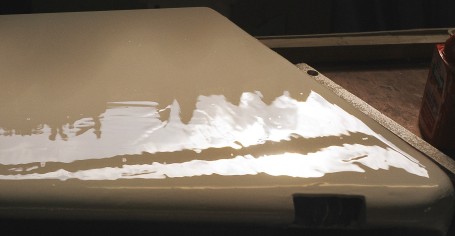
Gel-coat brushed on: 2004 05 25.
Canon AV-1, Fujicolor Superia Reala.
Despite the proof that the hairs left by the roller could be sanded off satisfactorily, I felt happier going back to a brush for the next coat. Here is the result just after application. At this stage it looks really glossy, but as it cures it becomes relatively matt. Most of it has flowed out quite well, but you can see a few areas where brush-marks remain; it must have been starting to gel just enough to inhibit the flow-out process.
|
|
|
go to next picture page |
|
|
||
| Return to Rowland's home page |
| This page last updated 2013-10-16. I try to make this page as accessible as possible, by adhering to HTML 4 standards. |
|
|
| I welcome comments on this website. However, because of the amount of spam it attracts, I no longer post a direct e-mail address on any page. Instead, please click here to contact me. You will have to confirm that you are human before the message will be sent on to me. | ||