|
|
Setup for first aileron hinge hole |
|
|
|
Navigation & Acknowledgements |
2 pictures on this page - scroll down to see the rest
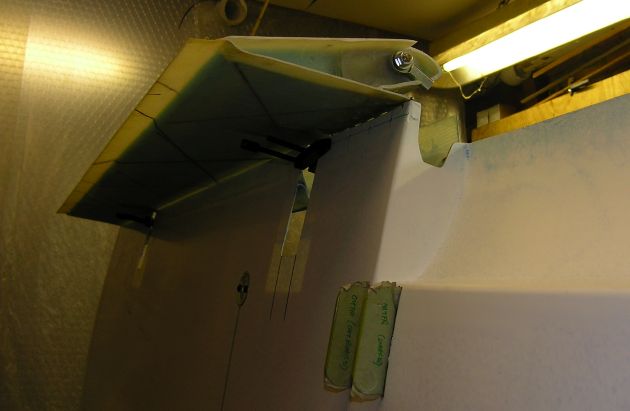
attaching port aileron to wing: 2008-02-19.
Nikon Coolpix 8400
With the aileron in the normal position, it's very difficult to get access to the hinges. The cutaway of the closeout end offers some hope at the root hinge, but there's no aperture near the outboard hinge apart from the horn slot. I couldn't find any clamp of a shape or size to fit in the tiny space between the horn and the slot and reach the hinge, so I adopted this approach instead. The aileron is placed against the wing TE in the 90-degrees down position, with the horns outside the wing TE, thus leaving plenty of room in the horn slots for toolmakers clamps. The aileron obstructs the approach to the hinge holes with a conventional drill, so I had to use the tight-fit drill kit (a right-angle adaptor with a very small head) to make the first holes in the hinges. Once the first hole was made in each hinge, I could dismantle this arrangement and re-assemble the aileron in its normal position, with clecos holding the hinges in place through those initial holes while the remaining holes were drilled.
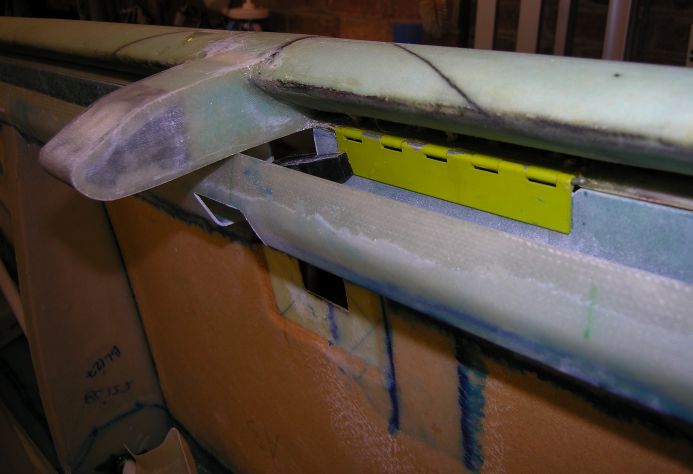
attaching port aileron to wing: 2008-02-19.
Nikon Coolpix 8400
The outer aileron hinge, held against the wing flange by a toolmakers clamp for drilling the first hole in the hinge. Also visible is the BID patch where the brown foam was cut away to extend the horn-box recess. The piece of BID used had an unused cutting line marked on it, which makes it look as if the BID stops at the edge of the recess. In fact it extends to part-way across the horn slot. The shape of the lead at the LE of the horn is noticeable here - on advice from Neville Eyre I modified it to give more clearance from the top of the horn box and thus give maximum down-aileron movement, without removing enough weight to jeopardise the final balance.
|
|
|
go to next picture page |
|
|
||
| Return to Rowland's home page |
| This page last updated 2013-10-16. I try to make this page as accessible as possible, by adhering to HTML 4 standards. |
|
|
| I welcome comments on this website. However, because of the amount of spam it attracts, I no longer post a direct e-mail address on any page. Instead, please click here to contact me. You will have to confirm that you are human before the message will be sent on to me. | ||