|
|
Bonding in port wing horn boxes |
|
|
|
Navigation & Acknowledgements |
5 pictures on this page - scroll down to see the rest
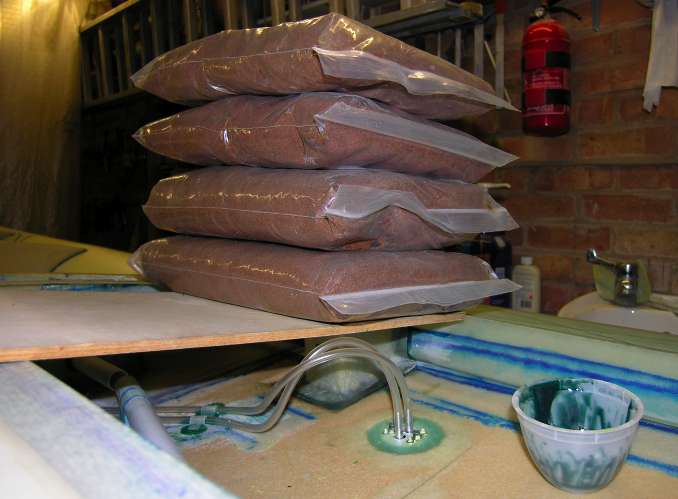
Bonding port inboard horn box: 2008-03-06
Nikon Coolpix 8400
The port inboard horn box weighed down for bonding in. It took a surprising amount of weight to get the horn-box flanges fully in contact with the bottom wing skin and the rear closeout, to ensure that the Redux joint was made over the whole intended area. I don't remember having so much trouble with the starboard ones, but that was nearly 5 years ago, so maybe the horn boxes had aged out of shape while they were in storage.
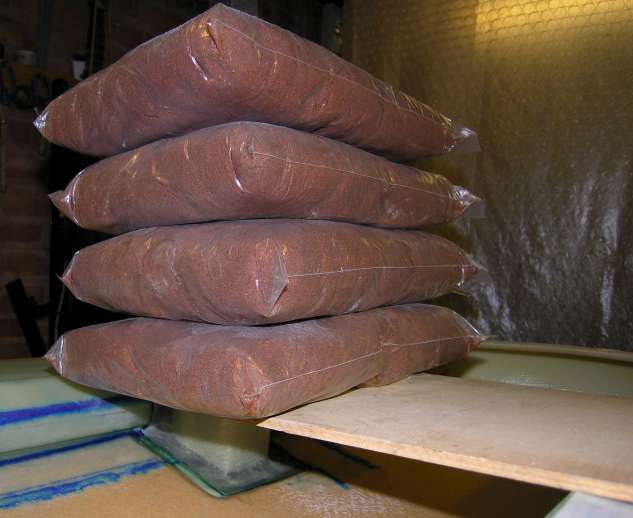
Bonding port outboard horn box: 2008-03-06
Nikon Coolpix 8400
The port outboard horn box weighed down for bonding in. Note the gap between the edge of the horn-box flange and the inboard edge of the recess in the lower skin, because I had to move the horn-box outboard slightly to align properly with the aileron horn. Part of the patch where the outboard edge of the recess was extended is visible in the shadow area.

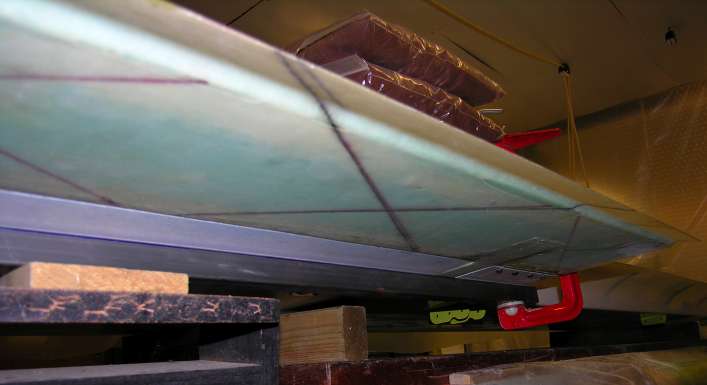
Bonding port horn boxes: 2008-03-06
Nikon Coolpix 8400
A speedclamp holding the inboard end of the square steel tube I used to keep the lower skin straight and true while the horn boxes were bonded in.
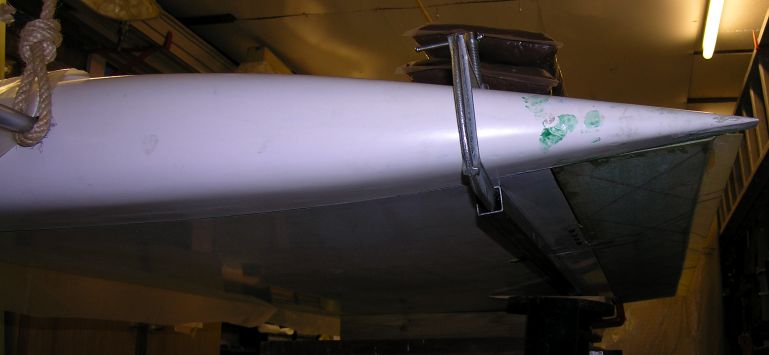
Bonding port horn boxes: 2008-03-06
Nikon Coolpix 8400
I supported the middle of the square steel tube with an adjustable stand and inserted a wedge to put a bit more pressure on it, to ensure that the tube was not bowing downwards in the middle.
Bonding port horn boxes: 2008-03-06
Nikon Coolpix 8400
Securing the square steel tube at the tip end was difficult, and this deep-reach clamp was the only thing that would do it, but only just. It didn't have enough depth to grip the outside of the tube, but fortunately the fixed jaw was small enough to slide inside the tube. I used a piece of wood to protect the inner surface of the wing from the working end of the clamp screw.
|
|
|
go to next picture page |
|
|
||
| Return to Rowland's home page |
| This page last updated 2013-10-16. I try to make this page as accessible as possible, by adhering to HTML 4 standards. |
|
|
| I welcome comments on this website. However, because of the amount of spam it attracts, I no longer post a direct e-mail address on any page. Instead, please click here to contact me. You will have to confirm that you are human before the message will be sent on to me. | ||