|
|
Wet sanding with guide coat |
|
|
|
Navigation & Acknowledgements |
3 pictures on this page - scroll down to see the rest
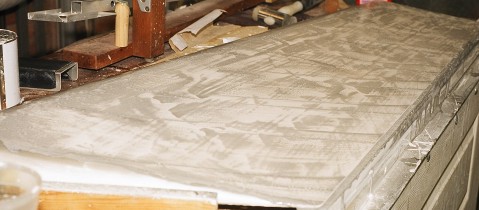
Wet sanding with guide coat (1): 2004 05 31.
Canon AV-1, Fujicolor Superia Reala.
Starting to rub down the port side of the rudder for the second time. The grey patches are the 3M Dry Guide Coat, left where the surface is lower and not yet being cut by the abrasive. Some grey lines along the length of the rudder are evidence of where the gel-coat was brushed out spanwise. The grey lines across the picture (chordwise) are trails of sanding slurry, witnessing to the chordwise movement of the sanding block. The dry guide coat is amazing stuff, a very fine black powder which you just rub onto the dry surface with a sponge applicator before starting to sand. It sticks to the surface with great tenacity, and even sloshing water and washing-up liquid on it for lubrication of the wet-and-dry paper does not dislodge it. Provided a flat rigid sanding block is used, only the high spots become white immediately, and the low spots stay grey until you have brought the surrounding areas down to the same level. Wet sanding is quite messy, but much less hazardous than dry sanding since no dust particles can escape. You need to add water quite regularly as the slurry thickens up and stops the abrasive cutting. Frequently cleaning the wet-and-dry paper off under a tap with a scrubbing brush helps too.
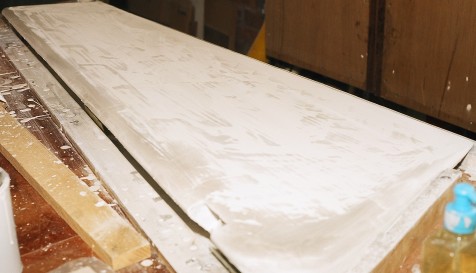
Wet sanding with guide coat (2): 2004 05 31.
Canon AV-1, Fujicolor Superia Reala.
A little later in the sanding process, with the grey patches getting smaller. They're easier to see here because I've just wiped off the sanding slurry to make the abrasive bite better.
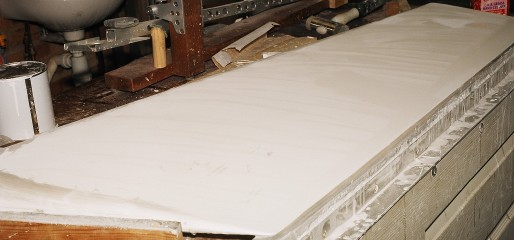
Wet sanding with guide coat (3): 2004 05 31.
Canon AV-1, Fujicolor Superia Reala.
Nearly all the grey patches have gone now. What looks like grey near the tip (top right) are mostly streaks and patches of water left from wiping off the slurry.
|
|
|
go to next picture page |
|
|
||
| Return to Rowland's home page |
| This page last updated 2013-10-16. I try to make this page as accessible as possible, by adhering to HTML 4 standards. |
|
|
| I welcome comments on this website. However, because of the amount of spam it attracts, I no longer post a direct e-mail address on any page. Instead, please click here to contact me. You will have to confirm that you are human before the message will be sent on to me. | ||