|
|
Bonding CS02 and CS03 |
|
|
|
Navigation & Acknowledgements |
3 pictures on this page - scroll down to see the rest
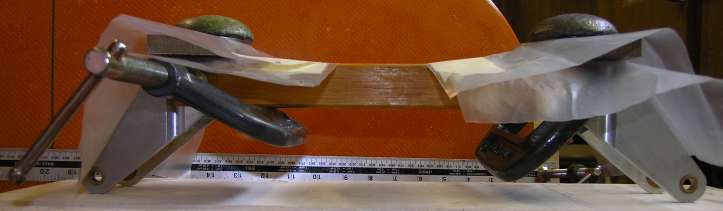
bonding CS02 and CS03: 2008-08-19
Nikon Coolpix 8400
To keep both CS02 bearing faces horizontal while bonding in the CS03s, I clamped the CS02s together with a couple of pieces of wood. Note that the screws of the g-cramps are on opposite sides for balance. There are sheets of polyethylene interposed between the CS04s and the CS03s, and between the CS04s and CS02s to provide a small clearance. The lead weights keep all the bearing surfaces parallel during cure of the Redux.
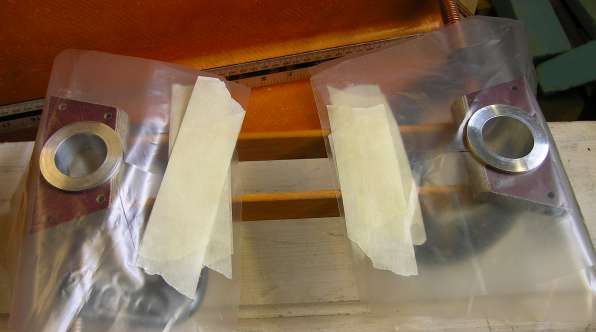
bonding CS02 and CS03: 2008-08-19
Nikon Coolpix 8400
The CS02 - CS03 bonding arrangement, with the lead weights removed. The sheets of polyethylene have holes cut to natch the bore of the CS04s, and are slit to allow easy removal after the bond has cured. The slits are bridged with masking tape to keep the polyethylene in position.
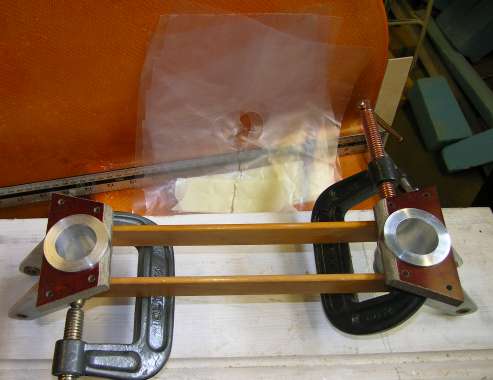
bonding CS02 and CS03: 2008-08-19
Nikon Coolpix 8400
The CS02 - CS03 bonding arrangement after removal of the polyethylene sheets.
|
|
|
go to next picture page |
|
|
||
| Return to Rowland's home page |
| This page last updated 2013-10-16. I try to make this page as accessible as possible, by adhering to HTML 4 standards. |
|
|
| I welcome comments on this website. However, because of the amount of spam it attracts, I no longer post a direct e-mail address on any page. Instead, please click here to contact me. You will have to confirm that you are human before the message will be sent on to me. | ||